Retro Sketch
Docs Home
Animation Preview WindowAtlas Maker Window
Canvas Window
Color Palette Manager Window
Color Palette Window
Color Picker Window
Export Window
Keyboard Shortcuts / Hotkeys
Layers Window
Menu Bar
Plugins
Project Setup Window
Quick Menu Window
Reference Image Window
Settings Window
Thumbnail Window
Timeline Track Bar
Timeline Window
Tools Window
- Brush
- Center Canvas
- Color Sampler
- Color Swap
- Eraser
- Flood Fill
- Grid
- History
- Import Image
- Nudge
- Reference Image
- Save Project
- Selection
- Shapes
UI Overview
Timeline Window | Retro Sketch Documentation
The timeline window allows you to view all of your animation tracks and control their order and placement as part of the whole animation. To open the timeline window, select the timeline icon on the left of the current track bar (#1 in the following image).
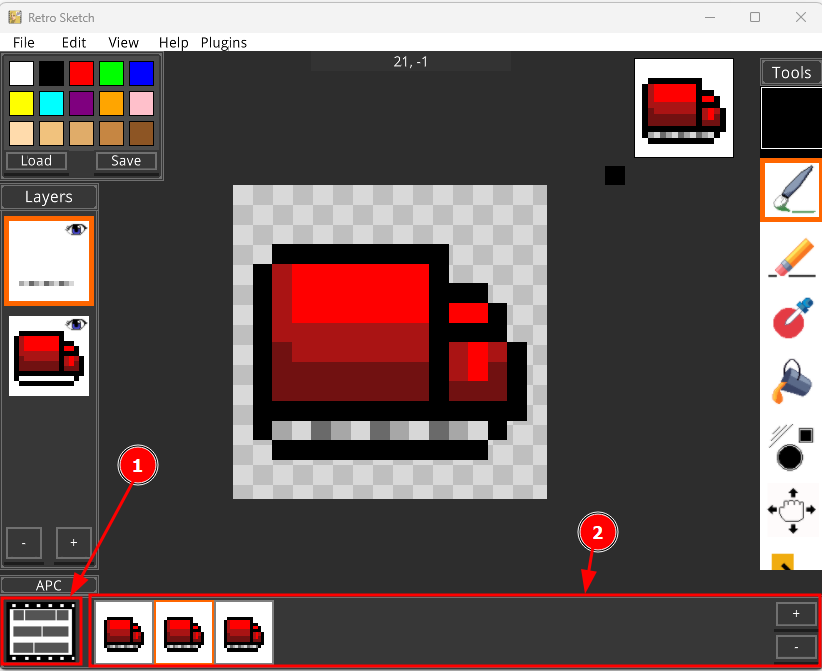
- Open timeline button
- The current track
Overview
You will be presented with the timeline window. The timeline window is a listing of all the tracks that make up your project and allows you to change settings on them as well as preview the animation.
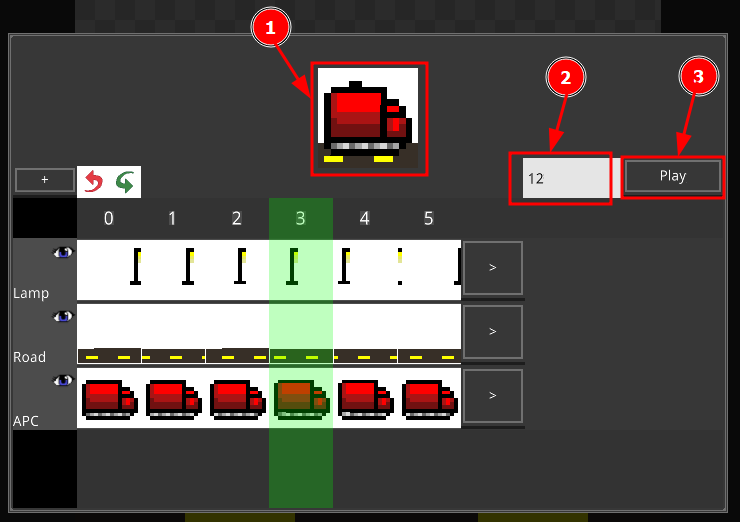
- The animation preview image
- The FPS (preview speed)
- Play/pause animation preview
The above controls allow you to preview your animation at a given playback speed. All of the tracks will be stacked on each other from top to bottom.
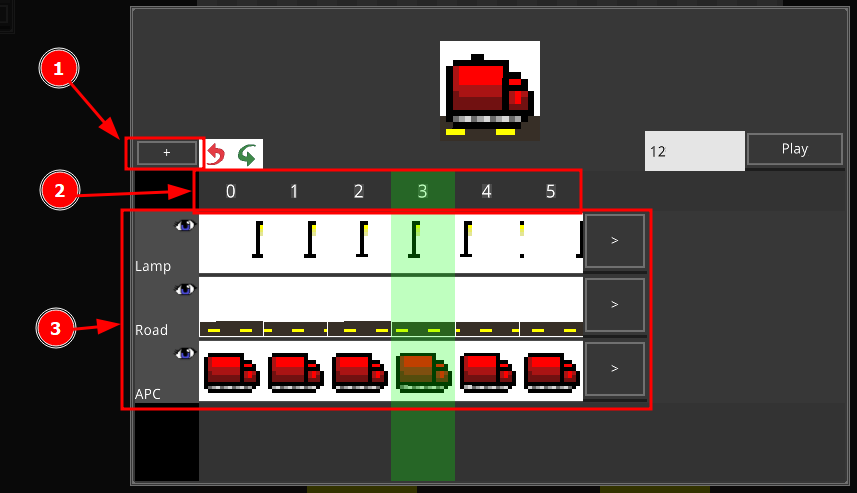
- Button for adding a new track
- The timeline frame ID
- List of tracks to modify/select
Creating a new track will place it in the foreground (at the bottom). You can enter into this track by clicking on one of the frame thumbnails (the pictures between the [<] and [>] buttons on the track). You can also click and drag on the numbered timeline to scrub the timeline preview. This will move the green play-head to where your mouse cursor is.
Moving Tracks
You can move a track in the timeline by clicking on either the [<] or [>] buttons. Clicking the [<] button will move the track one frame to the left. Clicking the [>] button will move the track one frame to the right. You can also move a track by right clicking on the track and setting the value for the "Start frame:" input field (matching the time code bar).
Rename Tracks
You can rename a timeline track by right clicking on the track and typing in a new name in the "Name:" input field.
Repeat Tracks
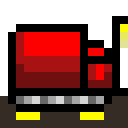
You can repeat a track's animation by right clicking on the track and typing in a value for the "Repeat count:" input field. In the screenshots used, the vehicle is actually only 3 frames of animation but has a repeat of 1 (thus 6 frames total).
Sorting Tracks
You can change the order of tracks by right clicking on the track and then clicking either the "^ Move" or "Move v" buttons. This will move the track up or down respectively.
Duplicate Tracks
You can duplicate tracks by right clicking on the track and clicking the "Duplicate" button.
Delete Tracks
You can delete a track by right clicking on the track and clicking the "Delete" button.
Track Visibility
You can show/hide tracks by clicking on the eyeball icon for the track in the left track handle.
Happy animating!